First, you need to login with the username and password that you created when you purchased the bot. If you haven’t downloaded the bot yet, you can do so via the dashboard.
2. Basic Setup
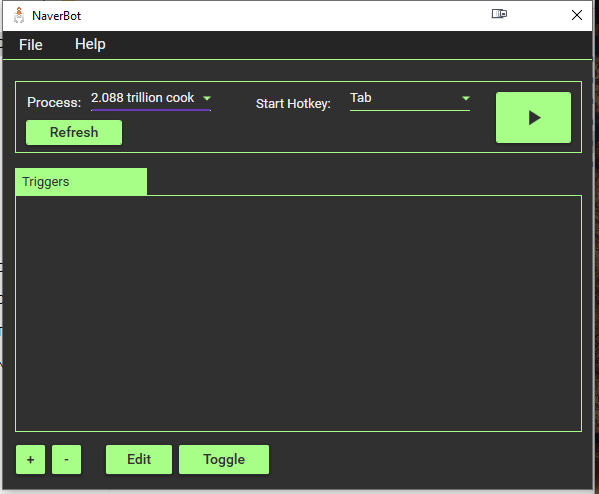
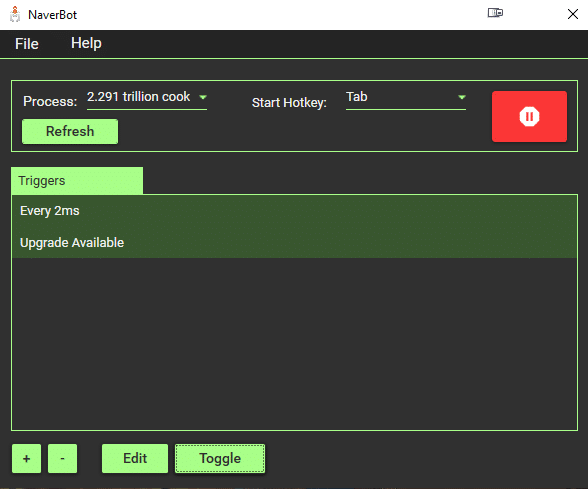
Next, you’ll want to choose your process and hotkey.
The process should have the name of the game that you want to open. For this example, we’ll be using the browser game “Cookie Clicker”.
You’ll also want to set your “Start Hotkey”. This is the button that you will press to turn the bot on and off.
3. Add Triggers
The easiest way to think of triggers is as groups of actions that get set off based on certain conditions. For instance, we’ll add two triggers.
The first trigger will go off every 2 milliseconds, which we’ll use to automatically click on the cookie.
The second trigger will search for a certain color on the screen, and once it finds it, it will trigger.
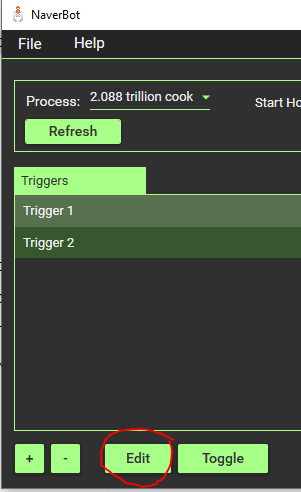
First, we hit the + button twice.
4. Setup Triggers
Now that we have two triggers, we are going to select the first one and click “Edit”.
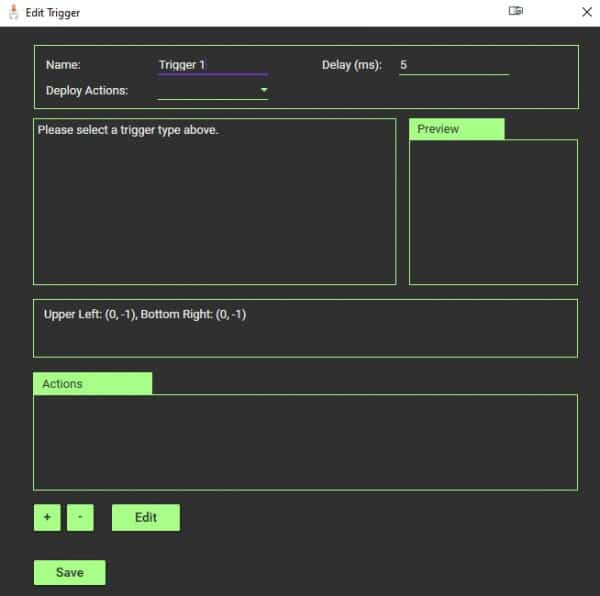
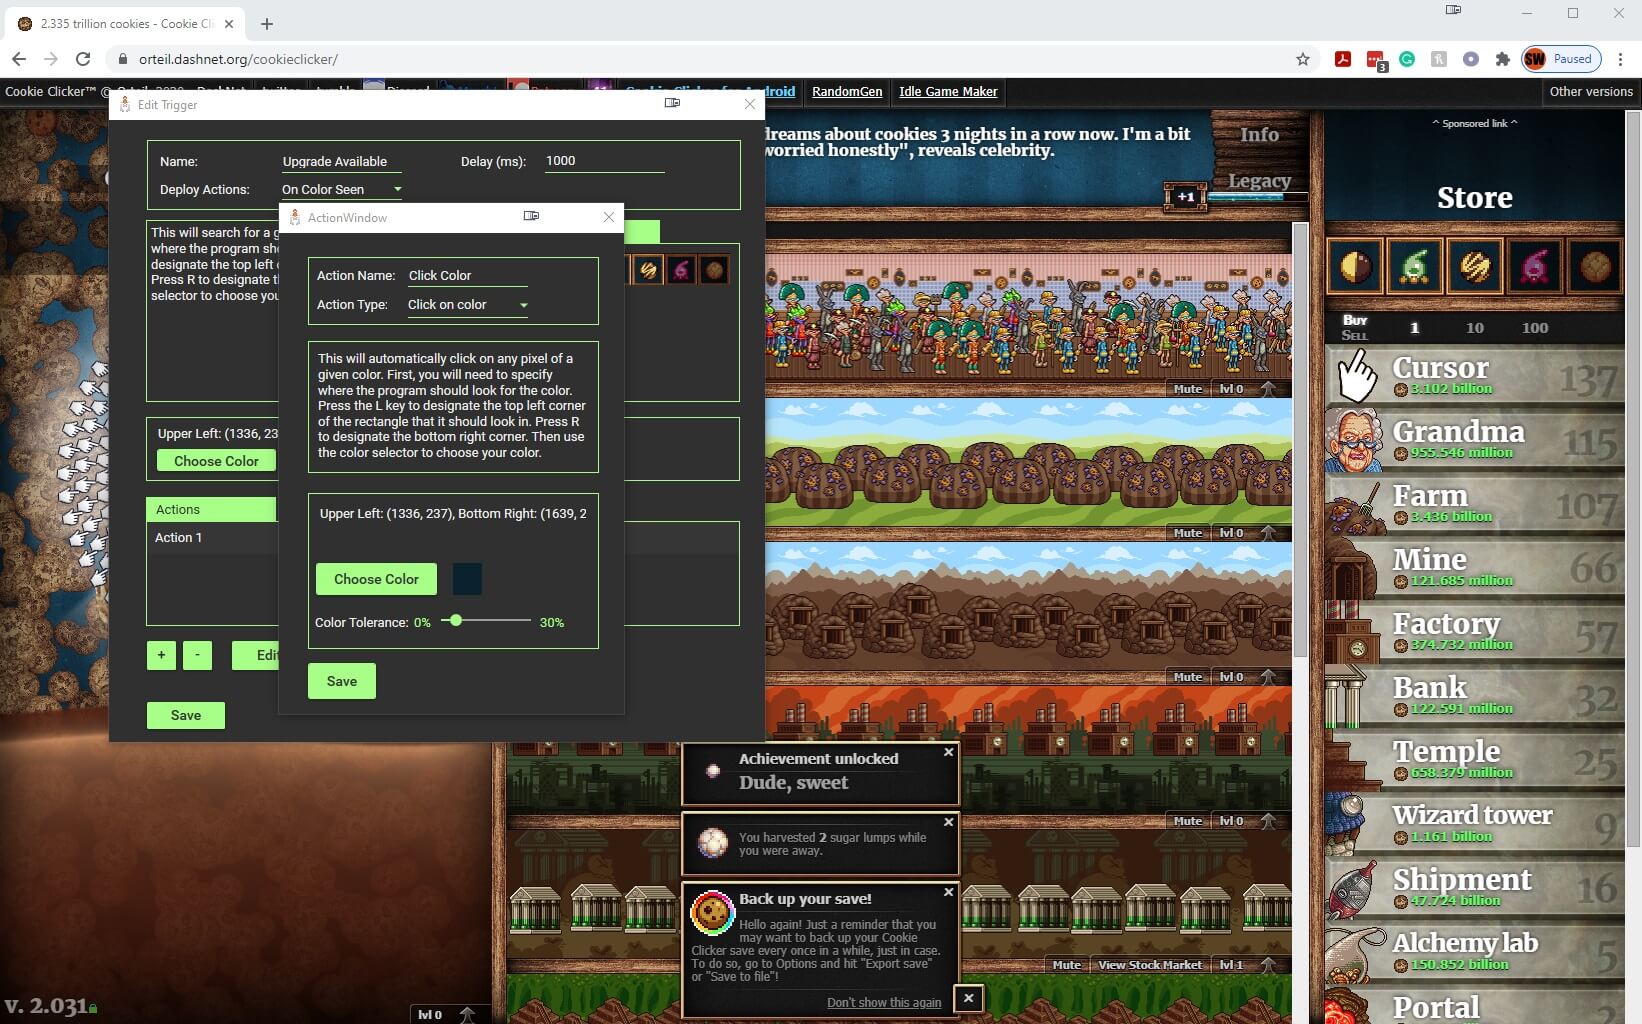
At first, the trigger setup page might look confusing. We will guide you through each part.
The box on top includes the basic settings for the trigger. The name is just for you to keep it organized.
Delay(ms) will determine how often your trigger is checked. For instance, if you have it looking for a color, and delay is setup to 500, then it will look for that color once every 500 milliseconds (0.5 seconds).
Deploy actions determines what will set off the trigger. There are two options:
Every X Seconds: this will automatically trigger all actions based on whatever delay you have set. If delay is set to 500 milliseconds, the trigger will deploy all actions every 0.5 seconds.
On Color Seen: this will check in a specified area for a specific color. This is useful for both things that change color when available and when setting up the bot for things like killing enemies.
Below the top box, you will find the description box. This will give you specific instructions on how to setup the trigger based on the options you chose.
To the right of the description box is the preview box. This will show the area that you have selected as the bounds that the bot should look for a color in.
On the third row is the data box. Here you will find important information, such as the coordinates of the search area, as well as the selector to choose a color.
Finally, you’ll find the actions area. This is where you can define the actions that will be triggered by the trigger.
Setting up trigger 1
We want the first trigger to automatically click on the cookie once every 2 milliseconds. For this, we will set the name as “Every 2ms”, we will set the delay to 2, and we will set “Deploy Actions” to “Every x seconds”. This is all that is required to setup this trigger. We will come back to the actions in the next section.
Setting up trigger 2
We want this trigger to fire when an upgrade is available. We can tell when an upgrade is available because its background color will change.
First, we set the name to “Upgrade Available”, and the delay to 1000ms. It is not important that this gets done more often than that. By setting a higher delay, we decrease the CPU load of the program.
Next, we set “Deploy Actions” to “On Color Seen”.
The next thing we need to do is set the area in which the program will look for the color. We do this by imagining a rectangle over the area that we want it to look in. We place our cursor in the top left corner of this imaginary rectangle, and click L.
Then, we move our cursor to the bottom right corner of it and press R. If you did it correctly, you should see your entire selection in the “Preview” window, as pictured below.
Now that we have our search area defined, we want to set the color that it looks for. Click “Choose Color”. In the dialog that pops up, you have a few options for picking your color. If you know the hex or rgb codes, you can use that. Otherwise, use the eyedropper circled below to choose the color off of your screen.
Additionally, you can set a “color tolerance” to decide whether you only want it to click on that specific color, or if it can be a little off.
Now that your bounds and color are set, you’re good to go! This trigger is all set up.
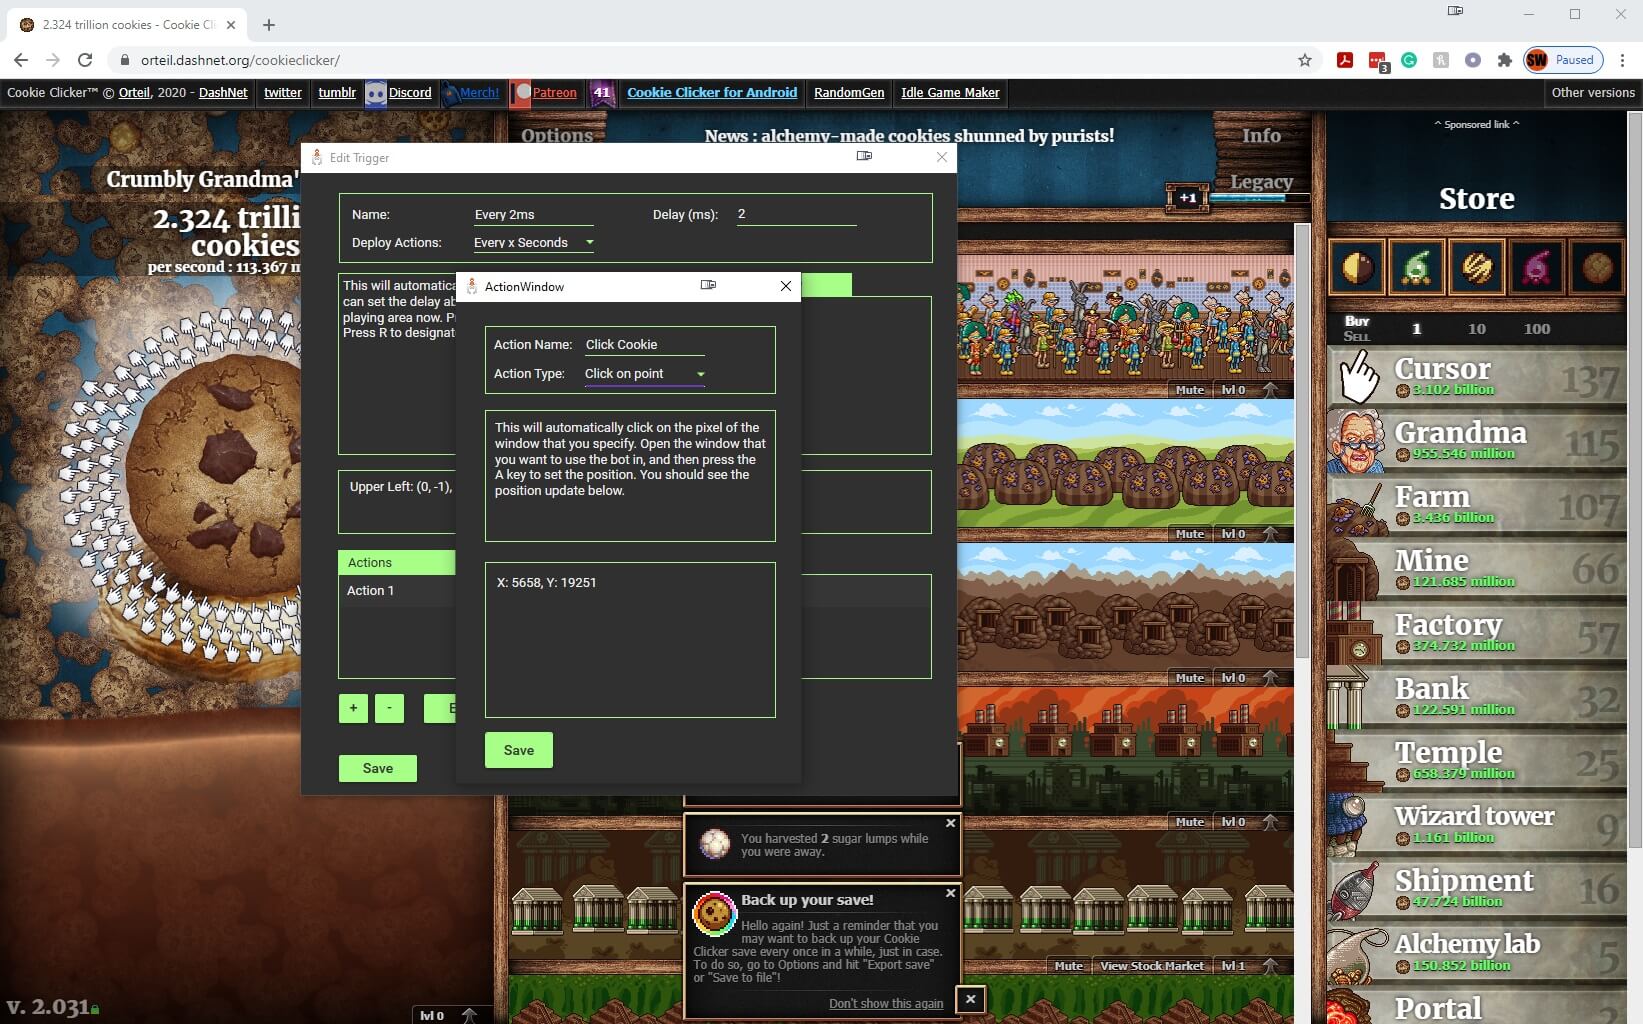
5. Setup Actions
The next step in configuring your bot is to set actions to be deployed by your triggers. Within the edit trigger window, you can add actions by clicking the + sign on the bottom, and edit them by clicking “Edit”.
Much like in a trigger, you can set the name to be whatever you want. The action type defines what sort of action this will be. The options are:
Click on point: This will click on a designated point in the window. You can choose the point by hovering over it and clicking A.
Click on color: Click on color will search a given area for a certain color, much like a trigger would. If it finds the color, it will click on it. For this, you must set bounds like you would in a trigger, and you must choose the color as outlined above.
Key Press: This will press the designated key on the keyboard.
Mouse Move: This will move the mouse to a given position over the keyboard. This can be useful if you need to do a key press on a given part of the window.
Other Mouse: If you need to press a mouse button other than left click, you can do so with this.
Setting up trigger 1 actions
Since we only want the first trigger to click the cookie, we only need one action. We will name it “Click Cookie”. The action type will be “Click on point”. We will hover over the cookie and press A, registering that point for the bot to click on.
Setting up trigger 2 actions
We also only need one action for the second trigger. We want it to click on whatever upgrade is available. So, we will name it “Buy Upgrade”. We will also set the action type to “Click on Color”. Next, we will set the search area using L and R, as we showed in previous steps. The same goes for the color.
6. Finishing Steps
Now that your bot is setup, there are a few final things to consider. You can save this preset by going to File>Save As. This allows you to open it back up whenever you want, without needing to reconfigure. One thing to note is that if you load a save, the window must be the same size as when you saved it, otherwise you risk the relative coordinates being wrong.
Additionally, you can enabled and disable triggers at will by selecting them and clicking “Toggle”. This allows you to have multiple potential bots in one save file, and to just toggle the ones you need.
7. Enjoy!
Your bot is all setup now! Just press whatever hotkey you set at the start and begin using it.
To use our bot for mobile games, you need to download an Android emulator on your PC. This will make it possibly to play Mobile games on your PC, and at the same time make it possible to run Naver Bot on your mobile game (via the PC).